North Iowa Photo Club
  • Home
  • About the Club
  • Resources
  • Events
  • For Sale
  • Contact
  • Blog

Resizing Images

4/6/2014

1 Comment

 
Have you ever received an email message with a huge photo attached that was so big that you had to scroll back and forth to see it? Have you waited and waited for your email messages to download because of a huge photo file that was attached to one of the messages? Have you tried to view a web page that takes forever to load some of the images?  It is likely in all of these cases that the images were not resized to a smaller size before adding to the email message or the web page.

I have recorded three short 6-7 minute videos on resizing photos. These are the same presentations that I did at the March club meeting in a condensed form. I show how to resize photos for email or the web using Photoshop Elements, Lightroom 4 and Microsoft Paint for those who don't have either of the previous two applications. You can find the videos on the Resources page.

The short version of the story is to resize your images for email or for the club monthly photo contests to no bigger than 800 pixels wide at 72 DPI
. Usually for email 500-600 Px in the longest dimension will work fine. If you are not sure, send an email message to yourself with the photo and see what it looks like in your email. 

- Bruce McKee
1 Comment

Photoshop Tutorial - Easy Highlighting

2/17/2014

1 Comment

 
Picture
Don Barnes put together a short tutorial on using Photoshop to do easy highlighting of photos. You can read his article here...
(opens a pdf file)

1 Comment

SAX-ZIM BOG

2/5/2014

1 Comment

 
Picture
By Jack Vanden Heuvel

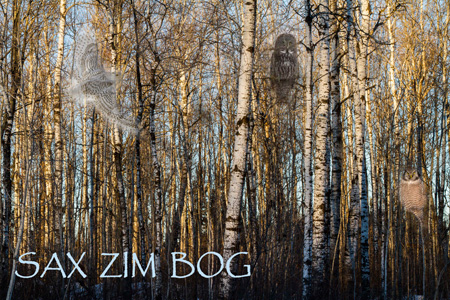
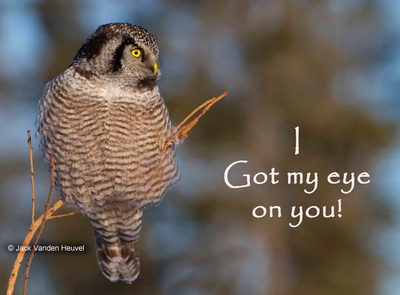
I just spent a couple days at the Sax Zim Bog in late January, 2014, doing photography.  Bruce asked me to give a report.  Located NW of Duluth, MN, it is a favorite place for those doing bird photography, especially of Great Gray, Snowy, and Northern Hawk Owls.  They also have feeders up to attract smaller birds such as the boreal chickadees and gray jays.

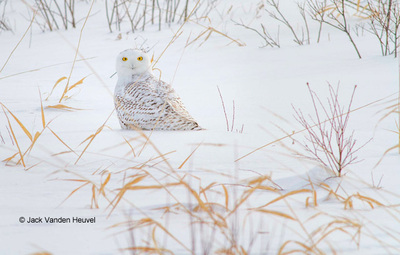
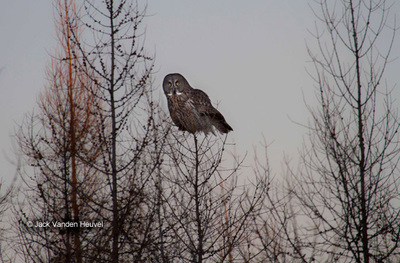
These are not tame birds, and it is a big area, so it is still not a sure thing.  I got good photos of a Snowy Owl and a Northern Hawk Owl.  I had three sightings of Great Grays, but that was rougher, since it was low light, and I was shooting fast with a high ISO.

Finding them is something you work on by yourself, but it is also helpful to find others who have stopped their cars because they are seeing something.  It is like the Yellowstone bear jams, only not that bad.  I really do appreciate other people’s eyes finding those owls.

It is pretty easy to get something of Snowy’s since once you find one they will hang out from a few perch places for hours.  I had not seen a Snowy since the 50s, so I had a great time simply watching this beautiful bird for hours!  They are so beautiful.  Their hunting ability is incredible.  They can spot a vole way in the distance, and go down there immediately and nail it!  Same for the Hawk owl!

Great Grays I still am after.  They are the largest of all owls.  I photographed one once by the Claybanks in Iowa with slide film many years ago.  It was exciting for me to actually see one again, and then to have three sightings!  BUT I only got to see them in the low light of early morning and late evening.

Although many of the photo people used tripods, I usually used a bean bag on the window of my car.

The best way to find out about this place is to go to their web site.  Even better than the web site by far, is to go to their Facebook account for regular updates.  They have their big birding festival there February 14-16, 2014.

I found the best birding on the north end, just west of the corner of Zim Road and Highway 7, and then again for Greys on Admiral near the Admiral feeders.

If you go there in winter, note that Lake Superior shoreline is fun to photograph too!

A great web site to get all kinds of ideas and updates on the whole Duluth area including Sax Zim Bog is pro photographer Sparky at http://thephotonaturalist.com/

To find out what is going on in the bog, it is always a good idea to talk to someone with a big lens, and just ask.  That is how I found the Hawk Owl, many miles away, on Owl Avenue.  By the way, I talked to a professional guide there with his clients.  They had all just been in Iowa at Lock and Dam 14 for eagle photos!  He told me there were 1100 eagles at Lock and Dam 13, but #14 was the best for photos.  Of course the North Iowa Photo Club knows that by now!

I have attended the Minneapolis Nature Photo Club that meets in REI and have appreciated contacts made there.  But the North Iowa Photo Club website is extremely impressive compared to other web sites by photo clubs!  I enjoy watching the Iowa Public Television videos Bruce posts as well.   I keep in touch with your web site, and miss the super club you are there in Mason City!!!  Keep welcoming one another, and have fun with your camera!
(Click the photos below to see a larger image)

1 Comment

Focus Stacking for Sharper Images

1/31/2014

1 Comment

 
Landscape photographers want highly detailed sharp images with everything in focus. The best way to achieved this is by  focus stacking. The lens is sharpest when it is stopped down one or two stops from its widest aperture. If you have a 16-35/F4 lens like I do, the sharpest images are produced when the aperture is set between 5.6 and F8.  Beyond that the image can get  soft due to diffraction... [Read the rest of the article here...]
- Article by Harsha Jayawardena
1 Comment

Cold-Weather Photography

1/29/2014

0 Comments

 
I was concerned about what might happen to the image sensor on my camera in very cold weather and if it would change the quality of the recorded image, so I posed the question on one of the photography forums that I follow. The consensus is that cold does not negatively affect digital image sensors. However, the cold will cause camera batteries to lose their charge sooner, and the cold metal of the camera on cold fingers or your face while taking pictures could increase the risk of frost bite. In cold weather there are often heat-waves coming up from the ground that will slightly distort things in the distance, causing pictures of distant objects taken with a telephoto lens to be unsharp.

Another real concern is condensation that may form on or inside the camera or lens when bringing it in the house (or into a warm car) from the cold outside, just like it does on my glasses. Condensation forming inside the lens or camera could ruin it and cause all kinds of mechanical, electrical or optical problems. Before I bring my cold camera in the house I will either zip it tightly inside my camera bag or I will put it inside a "dry bag" used for keeping things dry while canoeing or kayaking and seal it up tightly (a large sealed zip-lock bag may work also). First wrapping a towel around the camera may also prevent any moisture that may form inside the plastic bag from dripping on the camera. Then, when I bring it inside I will wait several hours to let everything gradually warm up to room temperature before opening the bag. I guess I can't be in too much of a hurry to get to the photos that I just took or to recharge the batteries.  Surprisingly, the same thing happens in the summer when taking a camera from the hot-humid outside in to a cold air-conditioned building. So the same steps should be taken to stabilize the temperature before exposing the camera to the colder room to avoid condensation.
Well, that is my photo-tip for the day.
- Bruce  McKee
0 Comments

Digital Mats and Frames (Photoshop)

6/28/2013

0 Comments

 
By Don Barnes
There are several reasons for creating a digital mat or frame for your image.  Maybe you just want to enhance your image for online viewing.  Perhaps you don’t have the tools and materials to make a traditional mat for your image.  Possibly you can’t find the right color or texture of mat to compliment your image.  For all these reasons digital matting and framing may be the answer to your needs. [Read More...]
0 Comments

Enhancing Images Using Vignettes (in Photoshop)

6/28/2013

1 Comment

 
By Don Barnes
Creating a vignette to highlight the subject of your photograph is an excellent way to enhance your images and is extremely easy to do in Photoshop CS6.  Here are Step by Step directions to make your images more powerful with vignettes. (While not exactly the same, these instructions will also help you create a vignette in Photoshop Elements as well.)

Step One
Open your image in Photoshop like usual... [Read More...] 

1 Comment

Camera Exposure for Eagle Photos

2/1/2013

0 Comments

 
Occasionally we provide links to web sites and blogs of club members and friends to highlight topics which may be of interest to club members. Larry Williams wrote a great article for setting your exposure when photographing flying eagles. He discusses some pretty high-end equipment, but all of the techniques apply to any camera. It starts here:

"Harsha asked me to provide a short Blog on how I set up exposure for photographing Bald Eagles at Lock and Dam 14.  This is not an easy endeavor to undertake.  The migratory eagles are at Lock and Dam 14 from December through February.  The skies are usually over-cast 90% of the time.  Under these circumstances, selecting the correct exposure to photograph eagles in flight is a challenge..." [Read more...]

0 Comments

Bald Eagles at Lock and Dam 14

1/18/2013

2 Comments

 
Picture
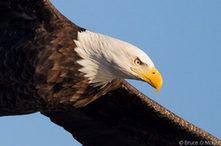
Photo by Bruce G McKee
Several club members have been photographing Bald Eagles recently at the Lock and Dam 14 on the Mississippi River near LeClaire, IA (near Bettendorf and Davenport). This is a great place to get pictures of the Eagles swooping down to the river to catch a fish with their talons as well as pictures of the birds flying or perched in nearby trees. The best time of the year is January and February. You can learn more about this photo opportunity by reading recent Blog postings by club members:
Bruce's Blog - Bald Eagles at Lock and Dam 14

Harsha's Blog - Photographing Bald Eagles, Lock and Dam 14, Mississippi River 2013


2 Comments

Photoshop Basics – Resizing Images

1/7/2013

1 Comment

 
Often we need to resize our images – one size and resolution for your Facebook posting, and a totally different size and resolution for the print you want to put on your office wall.  Photoshop makes resizing or reformatting your image pretty easy, but you do need to remember a few basic rules.  Let’s go through the process with one of my images using Photoshop CS6.

I’m shooting a Canon 5D Mk II using RAW capture.  When I open an image in Photoshop it is 15.6 inches x 10.4 inches at 360 ppi.  After I finish making my adjustments and corrections,  I want to post the image on my website.  For internet or web viewing, I typically resize my images to 5”x 7” [720 x 1008 px]  at 144 ppi.  This size seems to work well on my website and is still small enough that I don’t worry about the image being copied and printed without my permission.

With the image open in Photoshop I click on Image on the upper left hand side of the Menu Bar.  In the drop down menu that appears, click on Image size.  (In Elements 10 click Image> Resize>image size).  When the Dialog Box opens I will make sure that the scale styles, constrain proportions and resample image boxes are checked.  

Then I will change the width or height (whichever is the longest dimension in my photo)  to 7 inches which automatically changes the other dimension setting for me.  Then I will change the resolution to 144 ppi, and check to see that bicubic automatic is displayed in the selection window (in Elements 10 choose Bicubic sharper – best for reduction).  Then I click OK and my image is now ready to be saved as a jpeg for uploading to my website [remember to save as a different file name].

Once I have saved the lower resolution image I will go to the History palette (Window>Undo History palette in Elements 10) and click on the last history state that appears before my Image Size layer.  That will take my image back to it’s original size and resolution. 

Now I want to prepare the image to be sent to my lab which wants my images at 300 ppi resolution.  I again click on Image in the Menu Bar and open the image size dialog box.  (In Elements 10 click Image> Resize>image size).   After checking to be sure that the scale styles, constrain proportions and resample image boxes are checked, I will change the width to 12 inches and the height proportionally changes to 8 inches (for a horizontal image – for a vertical image change the height to 12 inches).  Then I change the resolution to 300 ppi with bicubic automatic displayed in the selection window and I click OK.  (In Elements 10 choose Bicubic smoother – best for enlargement).

One other  tip.  If for some reason your image opens into Photoshop with really large dimensions like 50 inches x 33.3 inches at 72 ppi, it’s a simple matter to increase your resolution without damaging your image.  Open the same image size dialog box we used above, but this time uncheck the box to the left of Resample Image then enter your preferred resolution in the resolution box.  Watch the dimensions of your image automatically adjust as you enter the new resolution.

Submitted by Don Barnes,  www.dbarnesphotography.com
1 Comment
<<Previous

    Photo Club Blog

    Periodic postings about club activities and photographic techniques from the members of the North Iowa Photo Club.

    Archives

    September 2016
    February 2015
    October 2014
    April 2014
    February 2014
    January 2014
    August 2013
    June 2013
    May 2013
    April 2013
    February 2013
    January 2013
    December 2012
    November 2012
    October 2012

    Categories

    All
    Aurora
    Birds
    Club
    Contest
    Landscapes
    Meetings
    Nature
    Northern Lights
    Photo Tips

    RSS Feed

Powered by Create your own unique website with customizable templates.